命名空间回顾
作用域可以分为类作用域、类名的作用域以及对象的作用域几部分内容。
在类中定义的成员变量和成员函数的作用域是整个类,这些名称只有在类中(包含类的定义部分和类外函数实现部分)是可见的,在类外是不可见的,因此,可以在不同类中使用相同的成员名。
另外,类作用域意味着不能从外部直接访问类的任何成员,即使该成员的访问权限是public,也要通过对象名来调用,对于static成员函数,要指定类名来调用。
和函数一样,类的定义没有生存期的概念,但类定义有作用域和可见域。使用类名创建对象时,首要的前提是类名可见,类名是否可见取决于类定义的可见域,该可见域同样包含在其作用域中,类本身可被定义在3种作用域内,这也是类定义的作用域。
如果发生“屏蔽”现象,类成员的可见域将小于作用域,但此时可借助this指针或“类名::”形式指明所访问的是类成员,这有些类似于使用::访问全局变量
1 |
|

作用域的类型
全局作用域
在函数和其他类定义的外部定义的类称为全局类,绝大多数的 C++ 类是定义在该作用域中,我们在前面定义的所有类都是在全局作用域中,全局类具有全局作用域。
类作用域
一个类可以定义在另一类的定义中,这是所谓嵌套类或者内部类,举例来说,如果类A定义在类B中,如果A的访问权限是public,则A的作用域可认为和B的作用域相同,不同之处在于必须使用B::A的形式访问A的类名。当然,如果A的访问权限是private,则只能在类内使用类名创建该类的对象,无法在外部创建A类的对象。
1 |
|
可以看到在类的外部想要使用内部类去定义一个变量的时候,私有成员无法访问。即使类内部的point类是共有的成员,我们也无法直接使用内部类,必须通过B::A的方式才能访问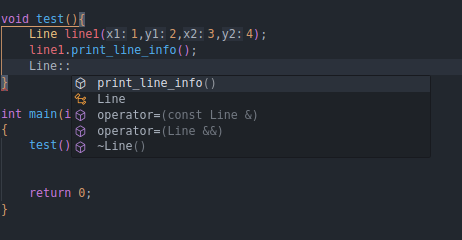
PIMPL 设计模式
PIMPL(Private Implementation 或Pointer to Implementation)是通过一个私有的成员指针,将指针所指向的类的内部实现数据进行隐藏。PIMPL又称作“编译防火墙”,它的实现中就用到了嵌套类。
下面是一个简单的例子来说明PIMPL的使用方式。
1 | class Line{ |
在一个头文件当中,我们定义了一个Line类,在类的内部,有一个私有的内部类,并使用了一个指针指向该内部类的实现。
具体的实现的代码如下:1
2
3
4
5
6
7
8
9
10
11
12
13
14
15
16
17
18
19
20
21
22
23
24
25
26
27
28
29
30
31
32
33
34
35
36
37
38
39
40
41
42
43
44
45
46
47
48
49
50
51
52
53
54
55
56
57
58
59
60
61
62
63
64
65
66
67
68
69
70
71
72
73
74
75
76
using std::cout;
using std::endl;
using std::hypot;
class Line::LineImpl{
public:
LineImpl(int x1, int y1, int x2, int y2);
void printLineImpl();
private:
class Point{
public:
Point(int x =0 , int y = 0)
:_x(x)
,_y(y){
cout << "Constructor of Point" << endl;
}
void print_info(){
cout << "(" << _x
<<"," << _y
<<")" << endl;
}
private:
int _x;
int _y;
};
Point pt1;
Point pt2;
};
Line::LineImpl::LineImpl(int x1, int y1, int x2, int y2)
:pt1(x1, y1)
,pt2(x2, y2){
cout << "Constructor of LineImpl" << endl;
}
void Line::LineImpl::printLineImpl(){
pt1.print_info();
cout << "----------------->" << endl;
pt2.print_info();
}
Line::Line(int x1, int y1, int x2, int y2)
:_pimpl(new LineImpl(x1, y1, x2, y2)){
cout << "Constructor of Line" << endl;
}
Line::~Line(){
delete _pimpl;
}
void Line::print_line_info(){
_pimpl->printLineImpl();
}
void test(){
Line line1(1,2,3,4);
line1.print_line_info();
}
int main(int argc, char* argv[])
{
test();
return 0;
}
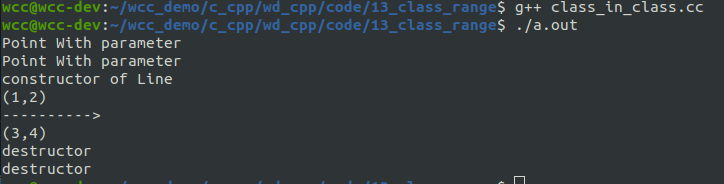
在上面的例子当中,我们将测试代码也写在这个里面,在实际的应用场景当中,我们只需要关注之前的头文件,这样可以将底层的信息进行封装。当我们修改该类的底层实现的时候,不会对上层的代码进行很大的修改。